 orkiva
 Manage users#
- Open Settings → User as an administrator. Review the user identity and provider before changing access.
- Create or edit a local user with the available fields, then assign the required role. For an external identity, manage provider-side identity attributes at the provider.
- Verify the user can sign in and access only the intended clusters and resources.
- Before deleting or disabling an account, identify automations or credentials that depend on it. Do not remove the last working administrative access path.
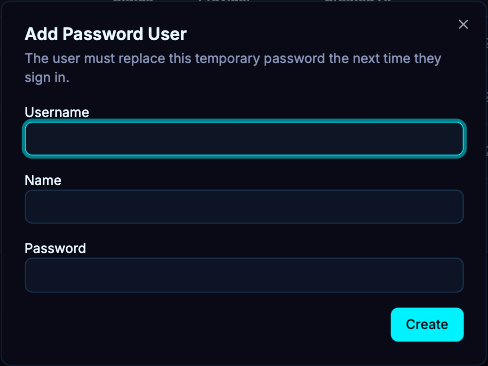
The user table offers Edit, Enable/Disable, Delete, Reset Password and Assign actions. Reset Password is limited to password-provider users; a reset revokes active sessions and requires the user to replace the temporary password on next sign-in. Creating a password user also uses a temporary password that must be changed. Use role filters to review access groups before changing assignments.
Create an API key#
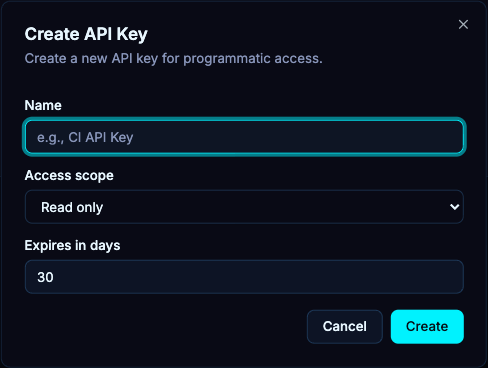
- Open Settings → API Keys and create a key with a name identifying the automation.
- Choose an expiration and access scope. The dialog defaults to read; write adds write permission, while admin includes read, write and admin scopes.
- Copy the newly displayed secret into the automation’s secret store. Do not place it in URLs, screenshots or source code.
- Use Assign on the API-key row to grant its required Orkiva role. Test a permitted resource read and a denied request before allowing mutations.
- Revoke the key when the automation is retired or the credential is suspected of exposure.
Scope is a limit on the credential, not a universal override of application authorization. Some operations require a current human MFA-authenticated session and cannot be performed with an API key.
The key dialog requires an integer expiration between 1 and 365 days and defaults to 30 days. Choose a lifetime aligned with the automation’s rotation process.
Use the key from a client#
For a key created in Settings → API Keys, place the complete orkiva-prefixed token directly in the Authorization header, without a Bearer prefix. Use the actual Orkiva server URL. The following request reads version metadata and avoids changing a cluster.
curl --fail-with-body \
  -H "Authorization: $ORKIVA_API_KEY" \
  "$ORKIVA_URL/api/v1/version"
Rotate credentials#
Create and test a replacement key, update the dependent automation, then revoke the old key. If the old key is expired or revoked, repeated requests will not refresh it into a valid key. Treat a 401 as an authentication problem and a 403 as an authorization problem after verifying the exact response.
The table also exposes Rotate on an existing key. Rotation replaces its secret; capture the newly displayed token and update dependent clients promptly. Use a separately created key for an overlap-based migration when needed. The key’s role assignments and scope limits are separate controls.