 orkiva
 Create a scoped role#
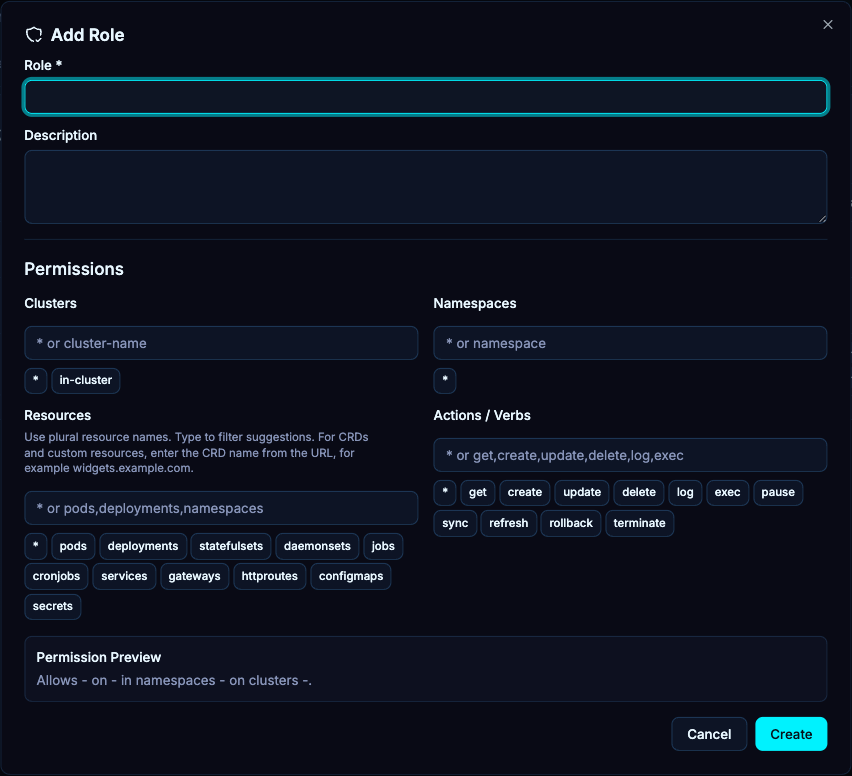
- Open Settings → RBAC and add a role. Give it a name that describes its intended access.
- Set the permitted cluster names and namespaces. Use explicit names for a scoped role; * means a wildcard, not an empty selection.
- Choose plural resource names such as pods and deployments. For a custom resource, use the CRD name described by the UI, such as widgets.example.com.
- Select allowed verbs. Read access and mutation access are distinct; include only operations the role needs.
- Read the permission preview and save. Resolve any validation or recent-authentication prompt.
Assign and verify#
- Use the role assignment controls to associate the role with the intended user or external group.
- Sign in as a representative non-administrator account.
- Verify one allowed read, one allowed mutation if applicable, and one denied action outside the intended scope.
- Check Delivery-specific permissions separately when the account needs projects, approvals or platform administration.
A role entry that exists but is not assigned does not grant access. A successful administrator session is not a meaningful test of a restricted role.
Common mistakes#
- Using a display label instead of the expected plural resource identifier.
- Granting namespace access but forgetting a required cluster-scoped resource.
- Assuming a UI button is the authorization boundary; backend checks still enforce access.
- Editing a file-managed role through the UI rather than the configuration source.
- Using broad wildcards to hide a permissions problem instead of identifying the missing operation.